
Making a Girl's Twirly Strip Skirt
Pick out two or more coordinating fabrics. How much you will need depends on your child's height and waist size. I picked up one yard each of two fabrics, and had more than enough to create a skirt for my 7 year old who is 50 inches tall. You will also need a GOOD thread that matches your fabric, EXTRA WIDE DOUBLE FOLD Bias Tape that matches your fabric, and thread the same color as the bias tape. Oh, and some 3/4 inch wide elastic long enough to comfortably go around the child's waist with at least 1 inch to spare.
Ideally you need a rotary cutting made and rotary blade. I suppose if you don't have one, nor a family member you can steal borrow one from, you can measure and cut by hand but I wouldn't recommend it. My brain hurts just thinking abouthow long that would take, and how unsteady my hand is.
Once you have your fabrics (I adore Hobby Lobby, they have super cute fabric, grouped by designer, with coordinating fabrics together and they are WAY cheaper than my other favorite place I wont mention here) Measure your childs waist. Multiply that by five. Yes, five. That is how wide you will want your skirt. If you prefer it to be less "twirly" you can go less. Then measure on your child how long you want it to be. I wanted my daughter's to go to about her knee. From where she wears her pants to her knee is 14 inches. I cut my strips 13 inches because by the time you take away for edges and add the waist, it all works out.
For this particular skirt I chose a large print fabric, so I cut my strips 5 inches wide. (Im not going to lie, the wider the strips the less I have to sew together to get to 115 inches) I have done skirts with 3 inch strips.
First, decide which fabric you want to have as your waistband and make sure you set aside plenty for that. The waistband should be about one half the width of the skirt, less if needed, but no more. I didnt want to buy more fabric just for the waistband, so while the skirt is about 115 inches wide my waistband is about 45. Next, figure out which way to lay your fabric to get the most amount of strips, carefully cut your fabric using your rotary cutter.


For this tutorial I used French Seams. They just look SO much better than regular seams. However, they take double the time. To me, it is worth it. If you choose to use regular seams, just ignore the extra steps. If you are fortunate enough to have a serger then that is the best option for nice finished edges and speed. One day I will have one.
Take your first two peices of fabric. Ignore your instinct to place the fabric right sides together. Place them WRONG sides together and sew along one long edge of fabric, remembering to backstitch at the beginning and the end of the stitch, staying close to the edge. I think Im about 1/8 inch here.


It will look totally wrong to you and that is perfect. Grab another strip of fabric and place it to one you have alreaday sewn, again, wrong sides together, being sure to keep with the pattern of your fabric. Then add another. 
And another.

And another.

This goes on FOREVER.
Once you have a ridiculously huge strip of fabric pull out your iron and make sure it is full of water.
Starting at one end, fold pieces one and two together, right side facing, getting the sewn seam as close to the edge as possible. Press. Then do the same with two and three, three and four, all the way til the end.

Back at your machine, sew peices one and two together in the direction you steamed them, RIGHT SIDES NOW FACING being about 1/4 inch and remembering to backstitch at start and finish.

After you do your first one check it and make sure that you can't see the edges from the original seam poking through. If you can, just sew another seam a little larger this time. When this is done, the front should look like a normal seam, and the back should be so beautiful and finished that you may want to cry. French seams are THAT beautiful. (Apparently I was so moved by their beauty that I forgot to take a photo, but you can kinda see here how they look. I will add a better one later)
Now do that a million more times til all your seams are finished. Take the two ends together and create another French Seam so instead of a long strip you have a loop wide enough to go around your Suburban.
Trim loose threads and iron the seams all pointing one direction. Now pull out your bias tape and iron out the places where it was wrapped around the cardboard.


Place the first inch or so along the bottom making sure the seams are pointing TOWARD you. I sew with the right side of the fabric facing up, but either way is fine. The seams pointing toward you is important, or when you are finished and taking pictures for the tutorial, your daughter will point out where the seam wasnt all the way down in the bias tape and tell you "You aren't a good sewer mommy"
 Back to the Bias tape. First secure it to the skirt bottom with a backstitch. You CAN pin this, but for me, it is easier not to. Once you have done your backstitch, pull back lightly on the bias tape, slightly stretching it as you sew. It will help with the ruffle. Go all the way around the skirt. For our skirt, the bias tape was 36 inches, but with stretching it made it around the entire thing. Barely. When you get to the back to the start, fold the edge of the bias tape under just a tad so the raw edge isnt showing and stitch over it, finishing with a backstitch. Then I turn the skirt and sew just a stitch or two along the opening so it is totally closed. This is your hem. For some fabrics, there just isn't a bias tape that will look good, so you can press and sew a regular hem.
Set aside the skirt and take the peice you have chosen for the waistband. Press in the side about 1/8 inch, then fold it over again and press. (Like a hem along the short sides) Stitch each side.

Then take the top of the waistband and fold it 1/4 inch and press, then one full inch and press again. You should have a few inches left under the folds.


Sew along the bottom of the pressed fold, closest to the rest of the fabric, creating the area for the elastic band to go through.
Fold fabric in half, creating a loop. With right sides together sew at 1/4 inch the left over fabric, TAKING SPECIAL CARE TO NOT SEW SHUT THE WAISTBAND. *Remember the waistband should be about double the actual waist that it will adorn)
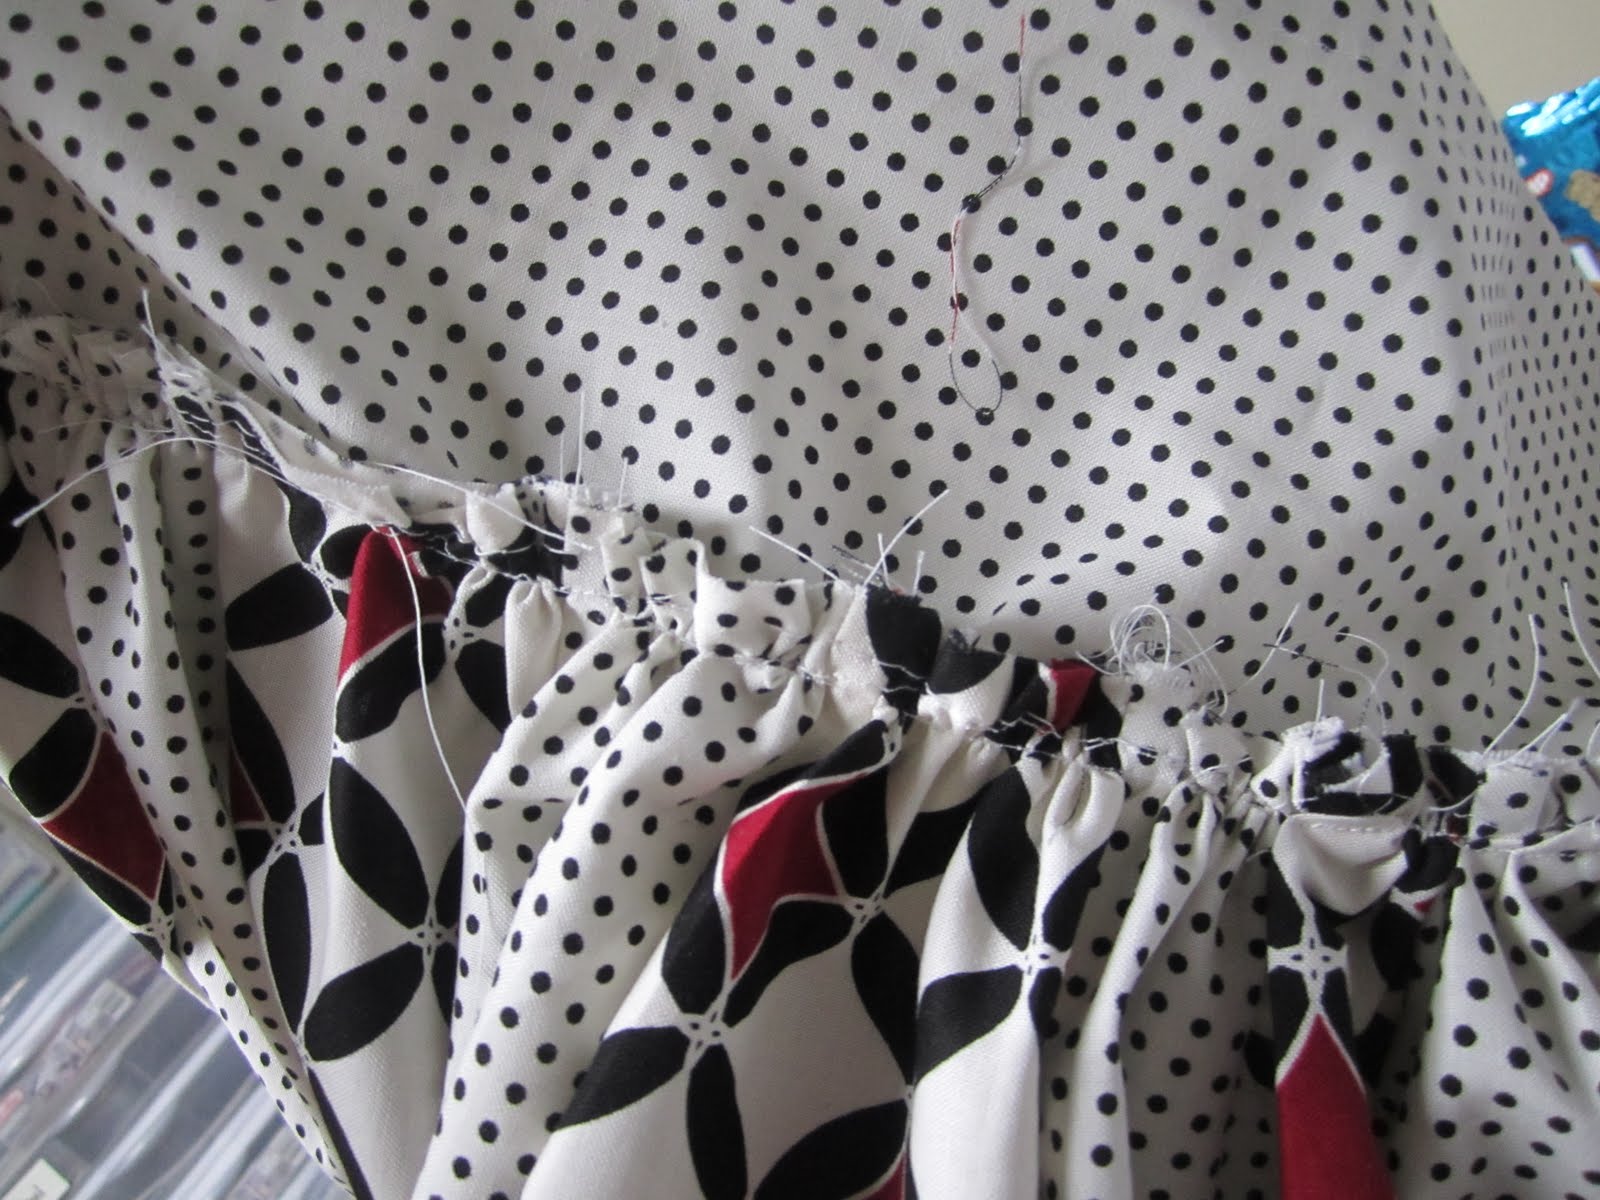
 If you haven't already, you probably want to refill your bobbin before this next step. Do one or two stitches about 1/4 inch down and backstitch. Without removing your needle, set your stitch to the longest possible. For most machines it is a 5. (Please make sure you are on LONGEST and not widest) Keep stitching all the way around the skirt, staying about 1/4 inch from top. When you get to the end, raise your needle and presser foot but DO NOT CUT THE THREAD. Pull the thread six or so inches before cutting it. Hold tightly to one thread while pulling the fabric away from you, or, use your preferred way of gathering. Your goal is to make the skirt the same width as your waistband.

With your skirt "right side out" and your waistband "inside out"match them up in size, pinning along the way. (The waistband is INSIDE the skirt, with wrong sides facing one another. You will likely have to adjust your estimated width of the skirt. Make the ruffles pretty even, though with this particular skirt its hard to tell if its even once it is finished, so I dont worry too much. As long as one section isn't ruffle-less it is all good. Once you have them matched as you want them, sew together, about 1/4 inch down. It is likely that you will have to help the fabric move along unless you have a walking foot. (Which I just realized I do and didnt use it. Oops) Now pull the waistband up over the skirt top and fold it down over the skirt, making right sides together. Stitch around the skirt at 1/2 inch, creating a French Seam where the waistband meets the skirt.


I had to do this step twice because the first time I was too close and when I finished you could see raw edges poking out. Now it looks like a skirt with a giant waistband. Cut your elastic to the size your child needs, adding one inch. Put a large Safety Pin on one end of the elastic and feed it through, making sure not to twist the elastic, while holding onto the loose end.

Now Im going to let you in on my dirty little secret. When the elastic is all the way through I lap then an inch over one and another and repin it. Nope, I don't sew the elastic. I suppose I should (and if you do overlap it like an inch and make a square with an X through the middle) This works for me. This way I can pass it onto another child without worrying that they will be too tall before the waist fits. It just works for us. I do it on all my skirts and have never had a problem. The girls have never complained of it bugging them. They go through the wash and everything. So pin your elastic together, tuck it in and Voila!! You have a twilry skirt.


PS If there are steps missing I blame the fact that I'm an idiot I was unaware that my settings were off. A special thinks to my gal Jenny for her help.


1 comment:
You did very good on how to do the skirt. The only thing the print on the brown background was hard to read.
Post a Comment